Assign tickets to a specific user to appoint ownership to each guest request or internal request.
To perform this action in ALICE, the user must have at least Employee User Type access.
The user must also have the following settings within “Roles” enabled”
Access to “Ticket List” tab.

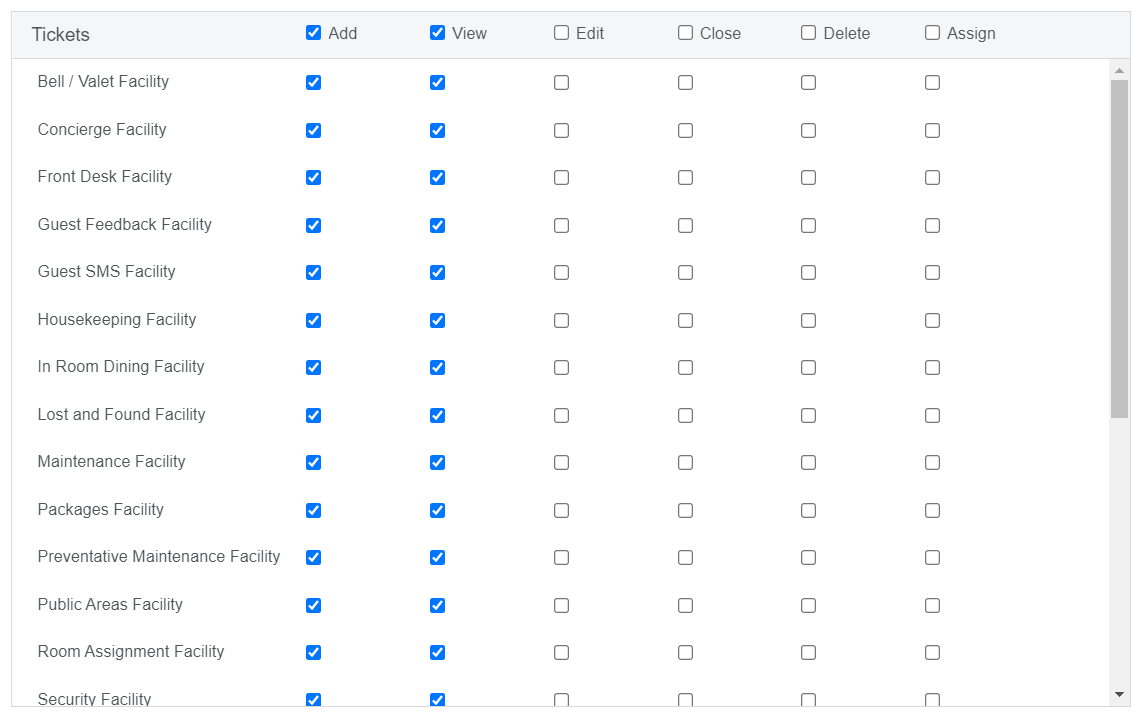
Access to “Add”, “View” Tickets.
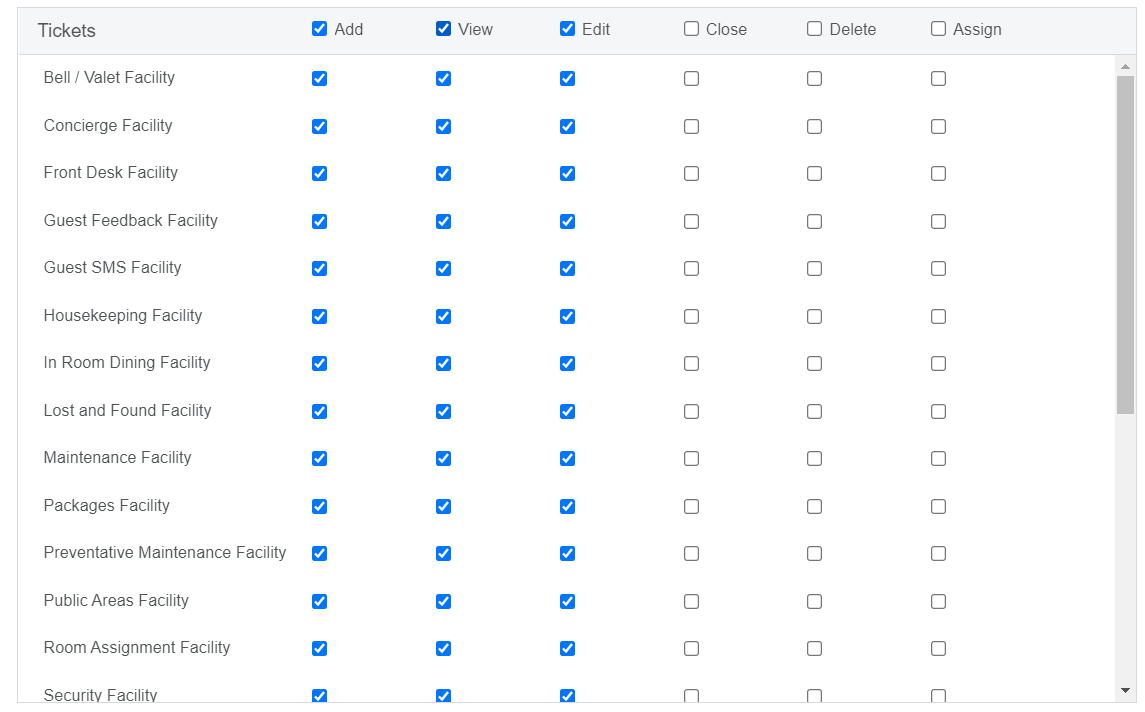
To update existing tickets with assignees, access to “Edit” Tickets.
Users with “View” access will also receive notifications for unassigned tickets. |
Tickets left as “unassigned” will be available for any user (with access to the associated Facility) to take ownership of.
For tickets that need immediate attention, assign tickets to users set to “Active” or “Away”. These users will receive notifications on their devices.
Jump to “Add Assignee to a New Ticket”
Jump to “Add Assignee to an Existing Ticket”
Jump to “Edit Assignee”
Select “+Guest Request” or “+Internal Request” to initiate a ticket.
Enter ticket details as appropriate.
Select the “Assigned to” field to access the user dropdown.
To take ownership of the ticket yourself, select “Assign To Me” next to the “Assigned to” field
(OR) Select a user to take ownership of the ticket. The user names are associated with a color and activity status to provide more information.
Select “Save” to create the ticket and send a notification to the assignee.

Learn more about the user activity statuses: AWAY (yellow): The user is logged in but has not had activity in ALICE in the last 15 minutes. This user will receive notifications on their device when assigned a ticket. PUNCHED OUT (red): This user is signed in, but has manually punched out, typically indicating a break. This user will receive notifications on their device when assigned a ticket. LOGGED OUT (grey): The user is not signed in and will not receive notifications if assigned to tickets. |
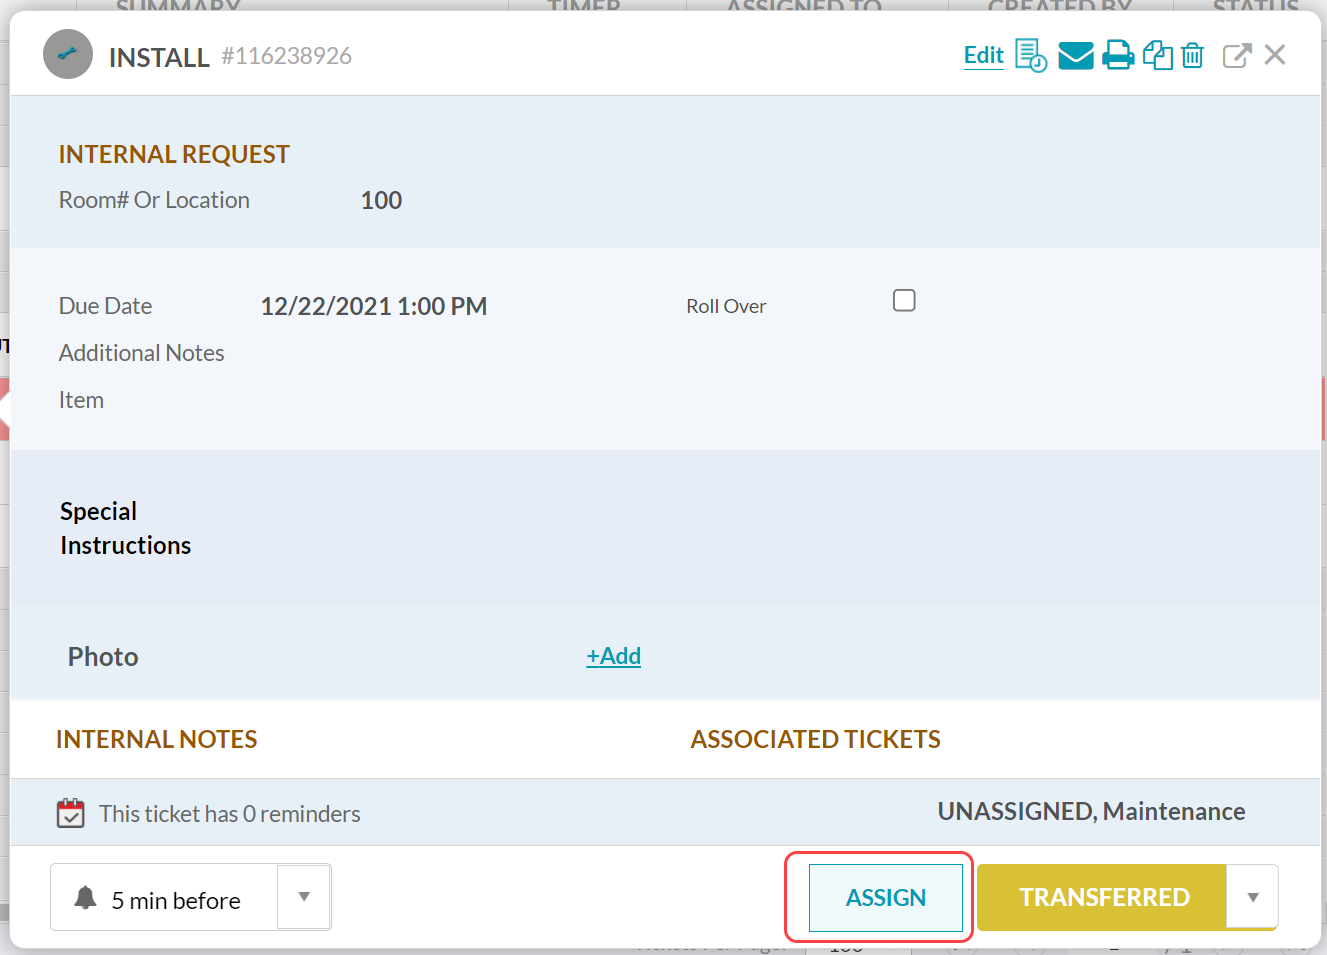
Select a ticket to open ticket details.
Select the “Assign”
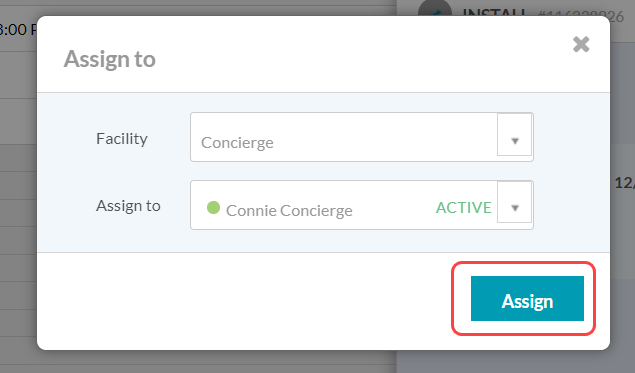
Select a user from the “Assign to” dropdown
(OR) to assign to a group of users who have access to a specific Facility, select the Facility from the dropdown, and leave the “Assign to” field blank.
Select “Assign”.
The changes will save automatically. Select the “x” to exit the ticket details and return to the ticket list.
Select a ticket to open ticket details.
Select the current assignee name, located in the bottom right corner.
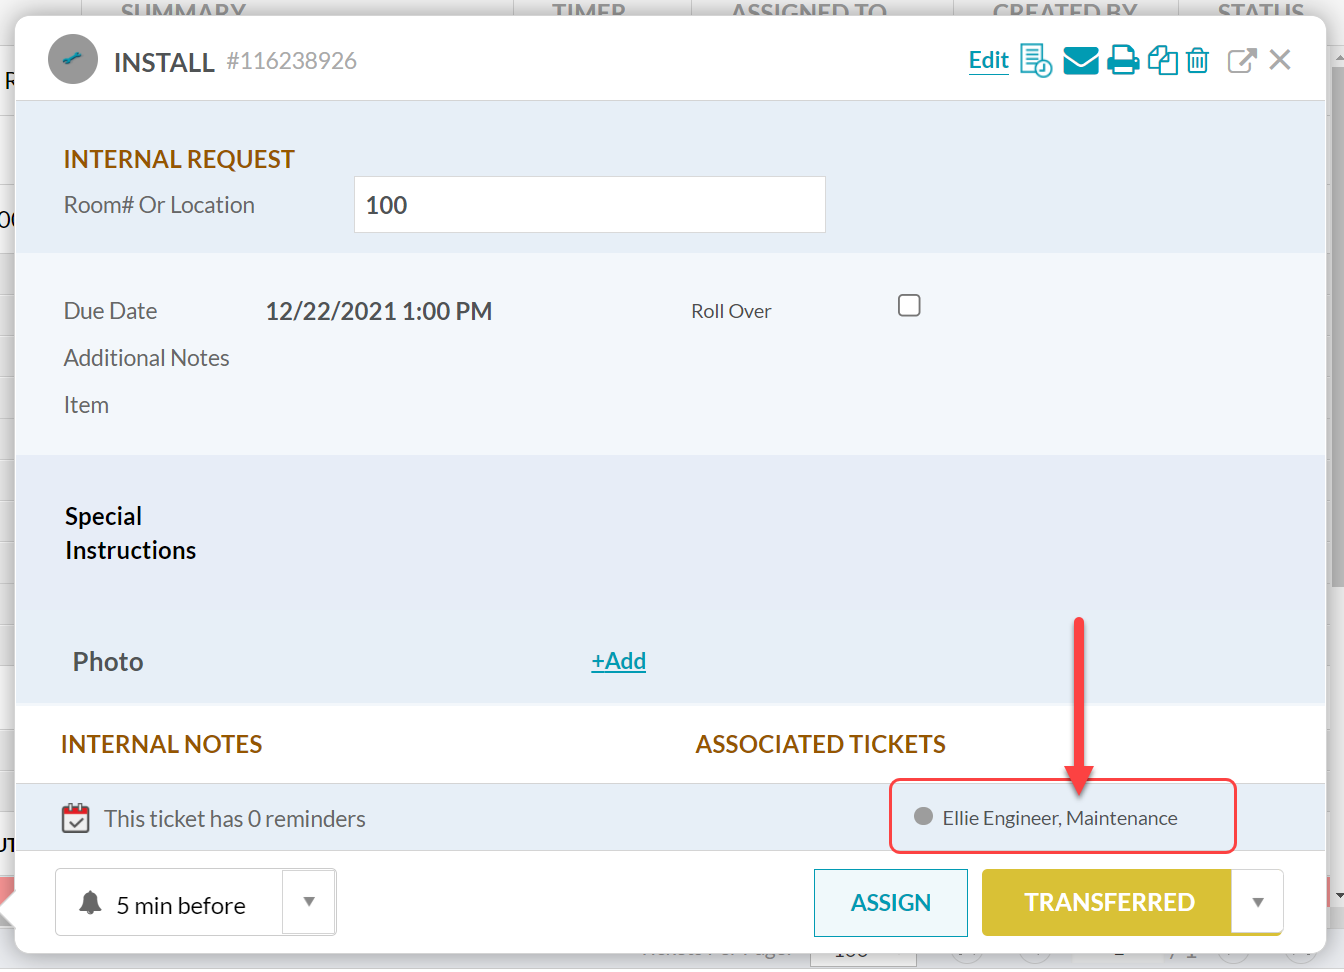
Select a user from the “Assign to” dropdown
(OR) to assign to a group of users who have access to a specific Facility, select the Facility from the dropdown, and leave the “Assign to” field blank.
Select “Assign”.

The changes will save automatically. Select the “x” to exit the ticket details and return to the ticket list.
The content by label feature automatically displays related articles based on labels you choose. To edit options for this feature, select the placeholder and tap the pencil icon.