...
Access to “Ticket List” tab.

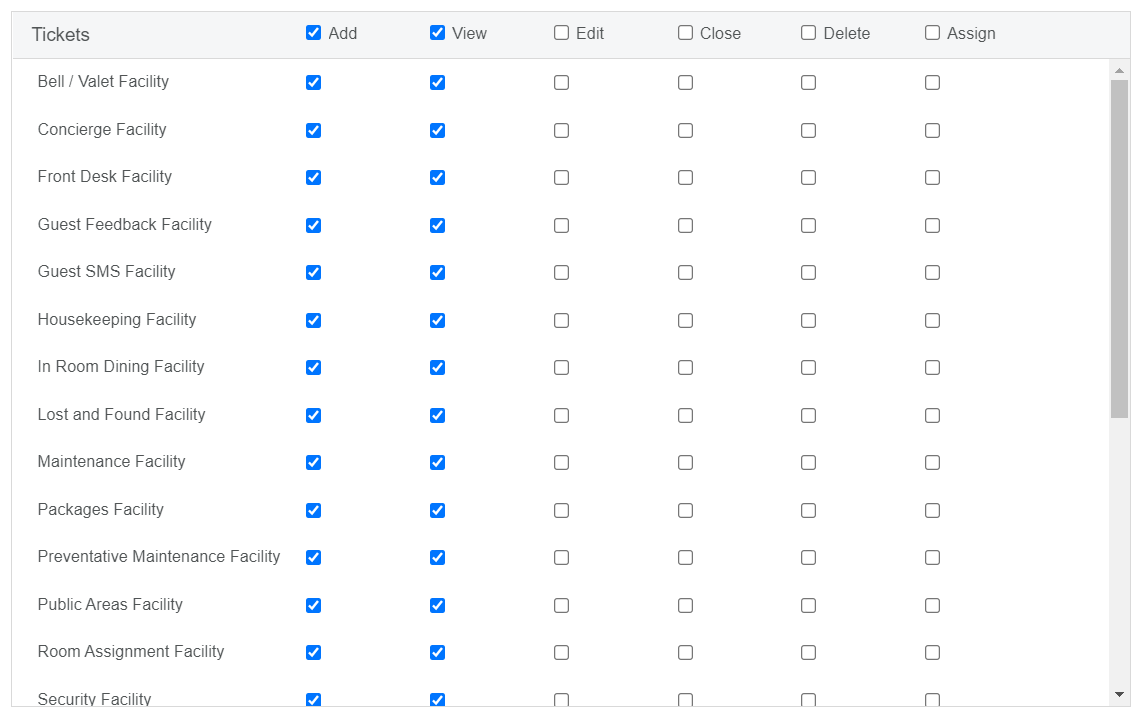
Access to “Add” and “View” Tickets.
| Info |
|---|
Users with “View” access will also receive notifications for unassigned tickets. |
 Things to Consider
Close Pinned Notes once they are no longer needed.
Pinned Notes with a workflow status equal to open will not generate a red dot on the calendar.
If a user is granted permission to “Add” Tickets but not “View” Tickets, they will be able to create Pinned Notes but will not be able to see any Pinned Notes.
Pinned Notes cannot be deleted, only moved to a closed status. It is, however, possible to delete the repetition on a Pinned Note to stop it from repeating further.
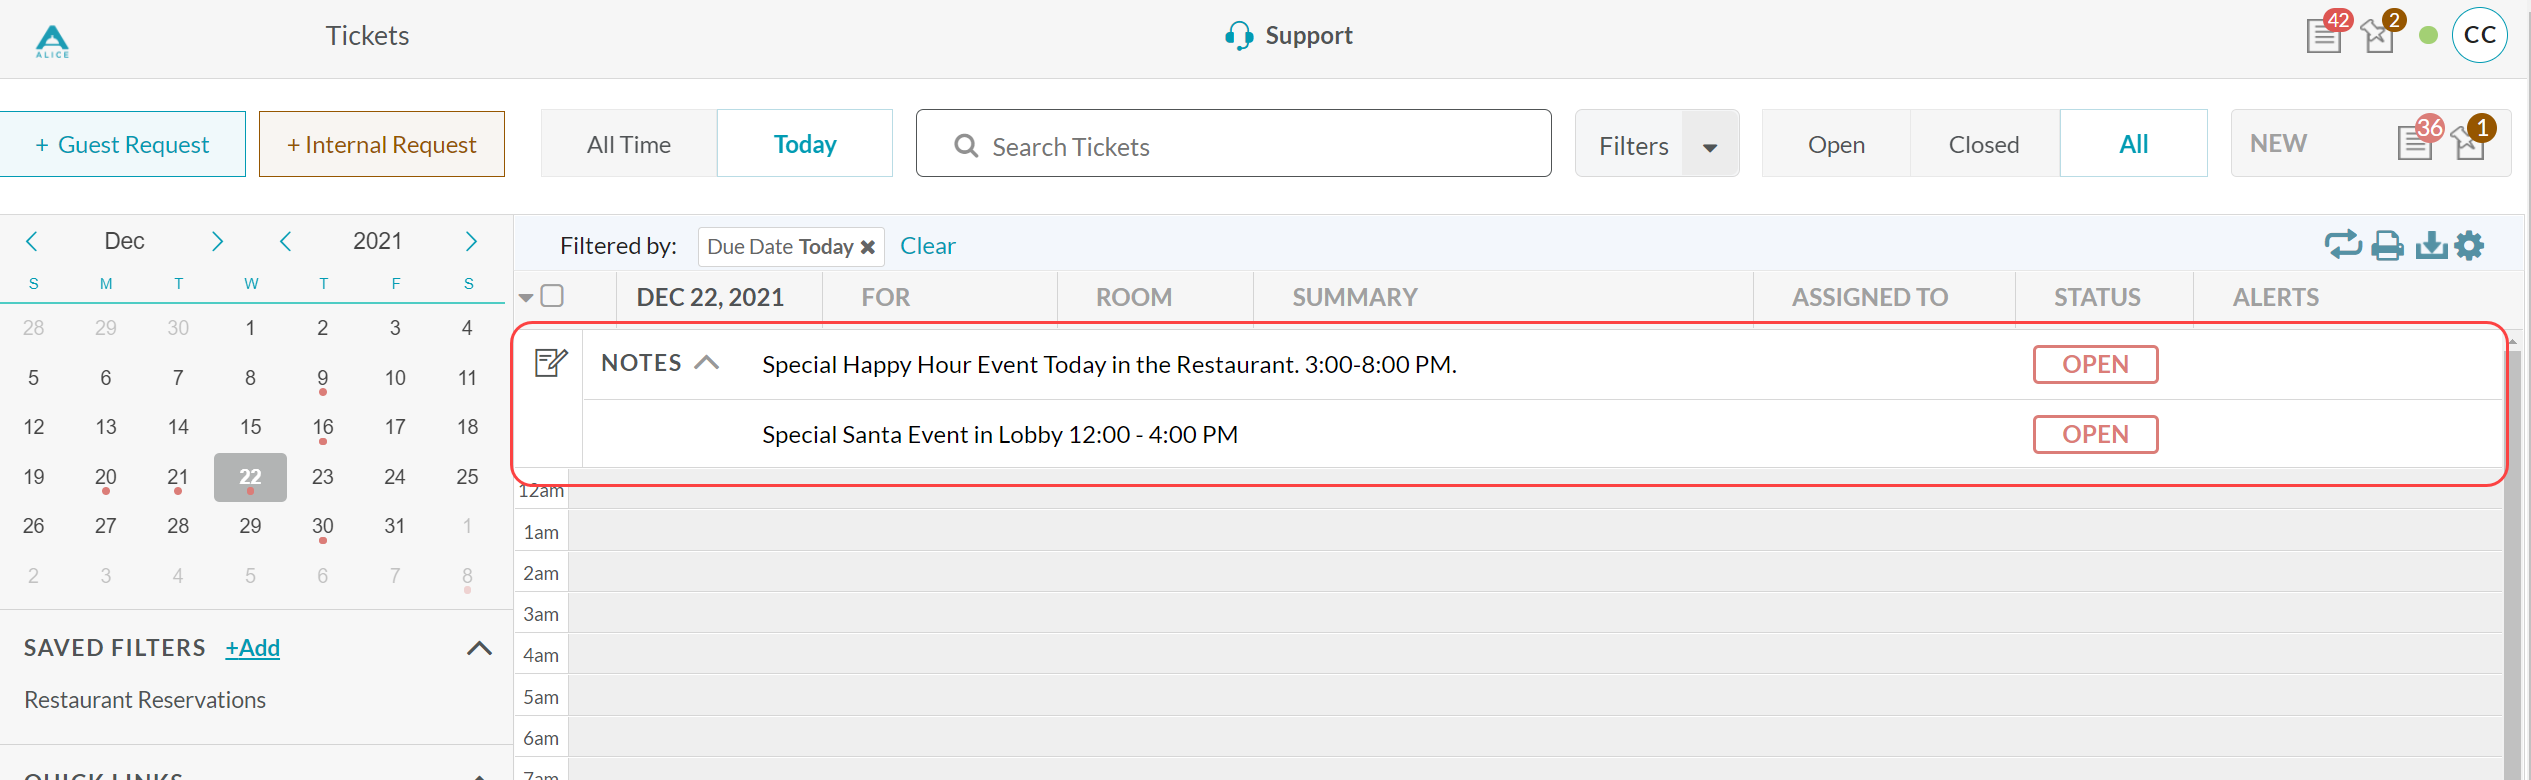
Expand/Collapse Notes using the chevron icon.
Jump to “Create a New Pinned Note”
Jump to “Edit a Pinned Note”
Jump to “Remove Repeat from a Pinned Note”
Jump to “Close a Pinned Note”
| Anchor | ||||
|---|---|---|---|---|
|
...
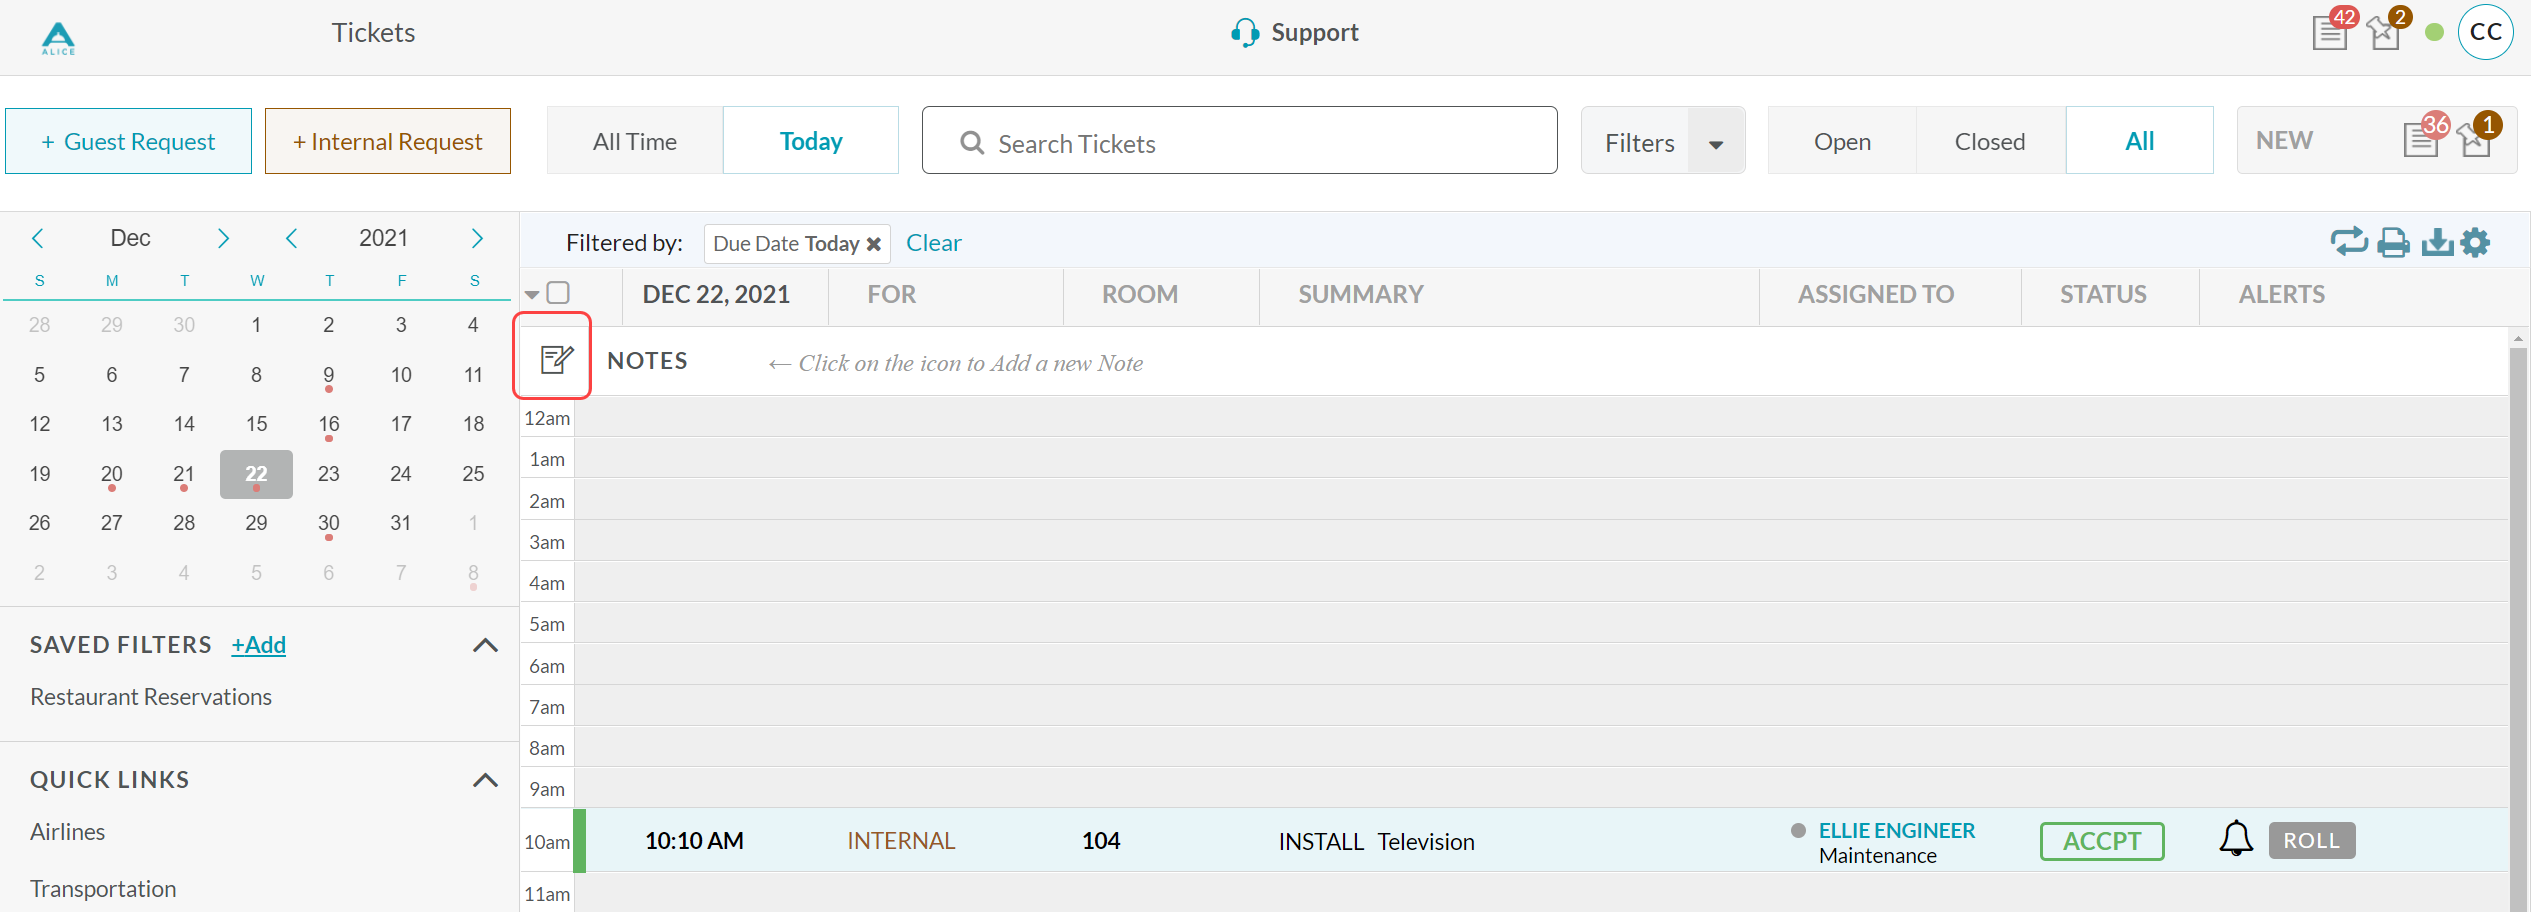
On the main ticket screen, select the notepad icon located at the top left-hand corner of the ticket list.
Enter a “Date”. The Pinned Note will appear for the first time on this date.
Select an option to control how often the Pinned Note appears.
Single: Create a one-time note.
Roll Over: The note will appear on the Date and then every consecutive day until the workflow status has been changed to closed.
Repeat: Set the note to repeat. Scheduling a repeating Pinned note follows the same logic as scheduling a repeating ticket.Leave the “Department” field blank if this Pinned Note should be seen by everyone (with the proper access set up in Roles- see above). Select a specific Facility from the dropdown if the note should only be seen by users with at least “View” access to that Facility.
Use the “Note” field to enter the message.
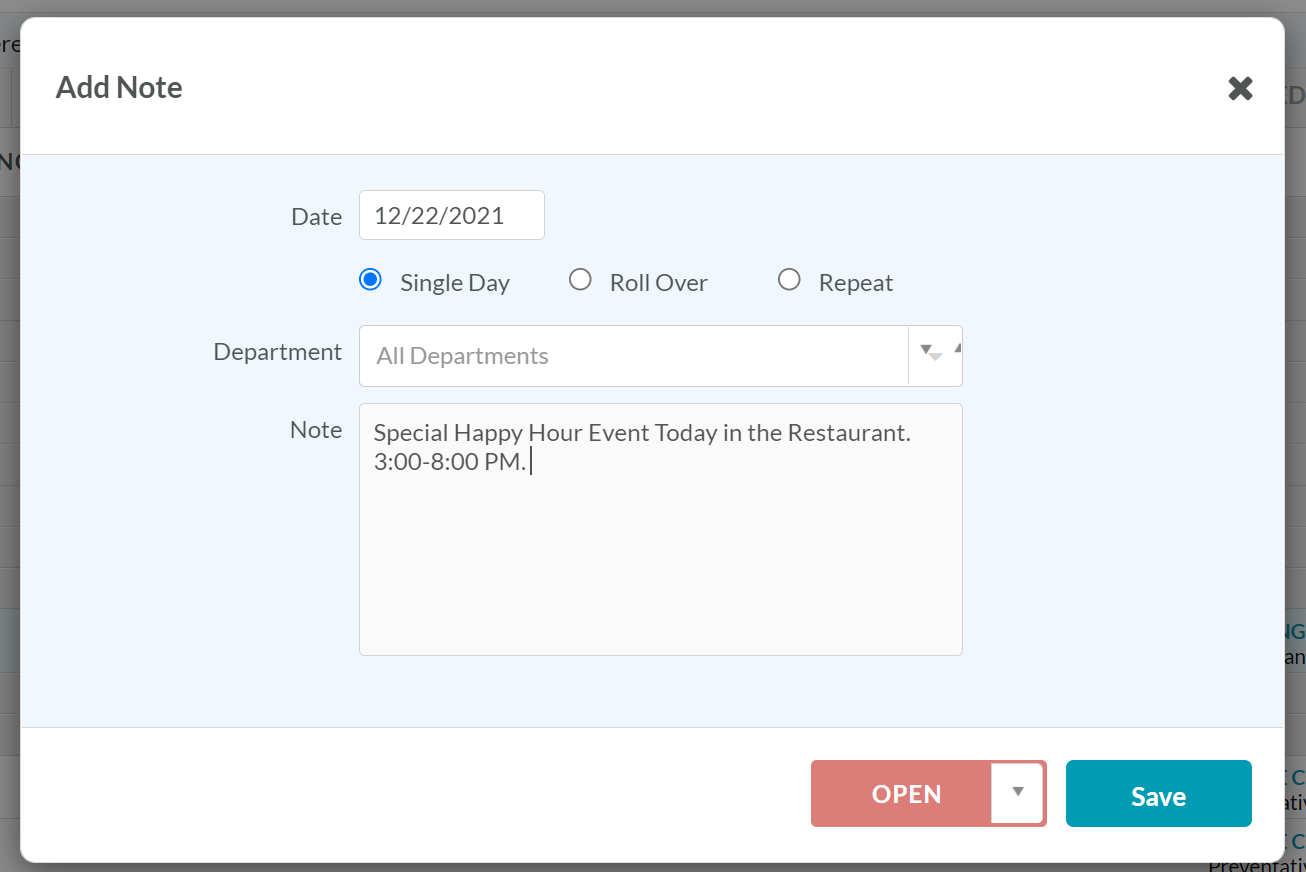
Select “Save” to post the note to the top of the ticket list.
...
Select the Pinned Note
Click “Edit”.
3. Select “Delete” in the Repeat settings window.
...