...
⚙ Steps
Access ALICE Admin
Select a Facility to build the Logbook/Inventory within.
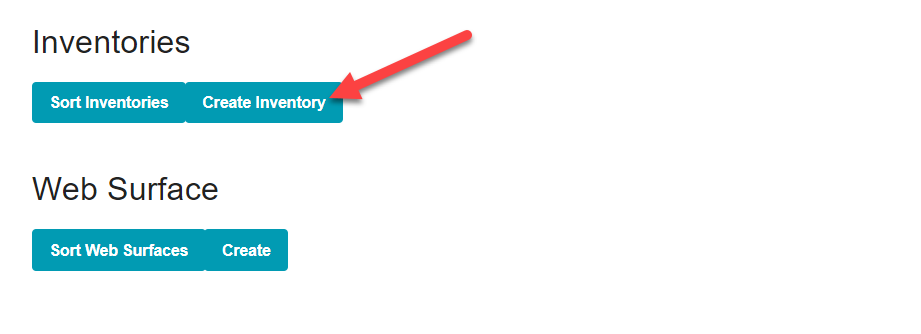
Select “Create Inventory”.
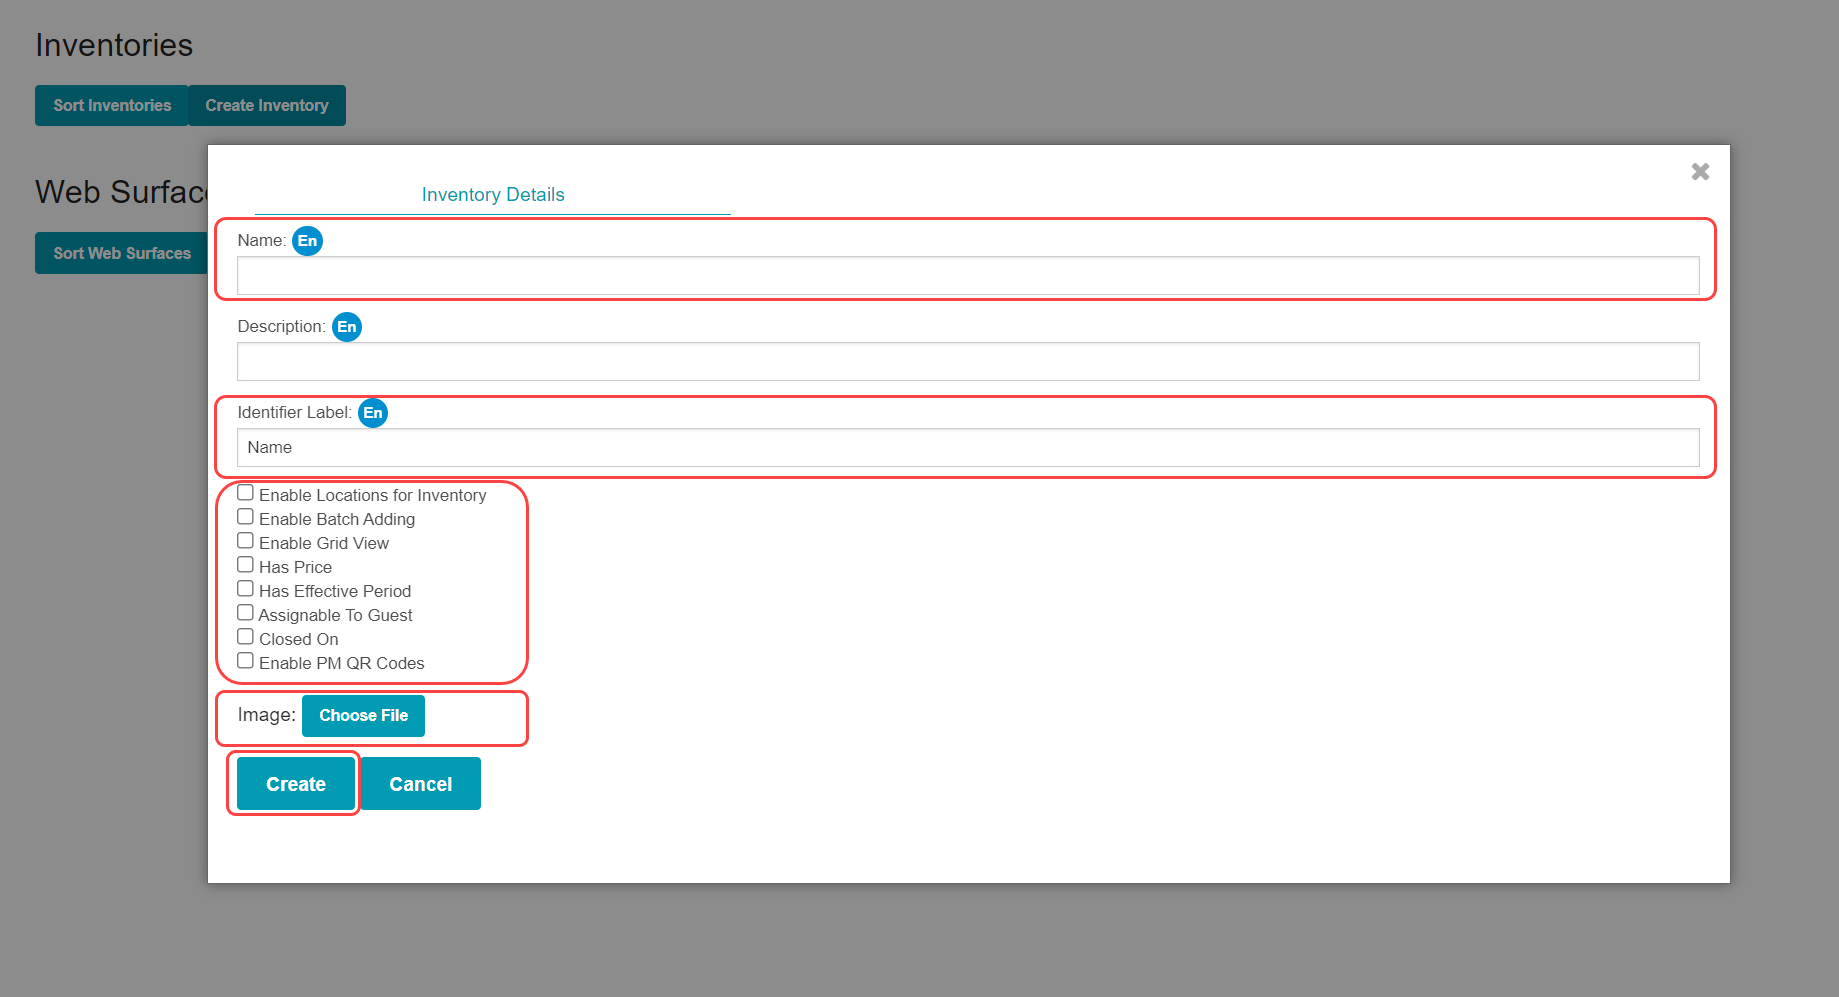
Enter the “Name” for the Logbook/Inventory.
Create an “Identifier Label” for the Logbook. The Identifier Label is the category for entries added to the Logbook. Consider what will be added to the Logbook and note that as the Identifier Label.
Example: Lost & Found Logbook Identifier Label = Item Description
Packages Logbook Identifier Label = Tracking Number (or) Package Description
Equipment Logbook Identifier
...
Label = Equipment Name
Determine which Inventory Settings should be enabled/disabled. Select the checkbox to enable. Leave the checkbox empty to disable.
Add an icon to make the Logbook easy to identify. If no icon is added, the first initial of the Inventory Name is used. To add an icon, select “Choose File” and select a saved image.
Select “Create” to save the Logbook/Inventory.
| Anchor | ||||
|---|---|---|---|---|
|
...
Logbook Name | Inventory Item Type Example 1 | Inventory Item Type Example 2 |
|---|---|---|
Lost and Found | Lost Item | Found Item |
Packages | Packages Incoming | Packages Outgoing |
Equipment | HVAC | Boilers |
Extra Items (BETA) | Rollaway Beds | Cribs |
Select “Create Inventory Item Type”.

Name the Inventory Item Type. This is the only required field.
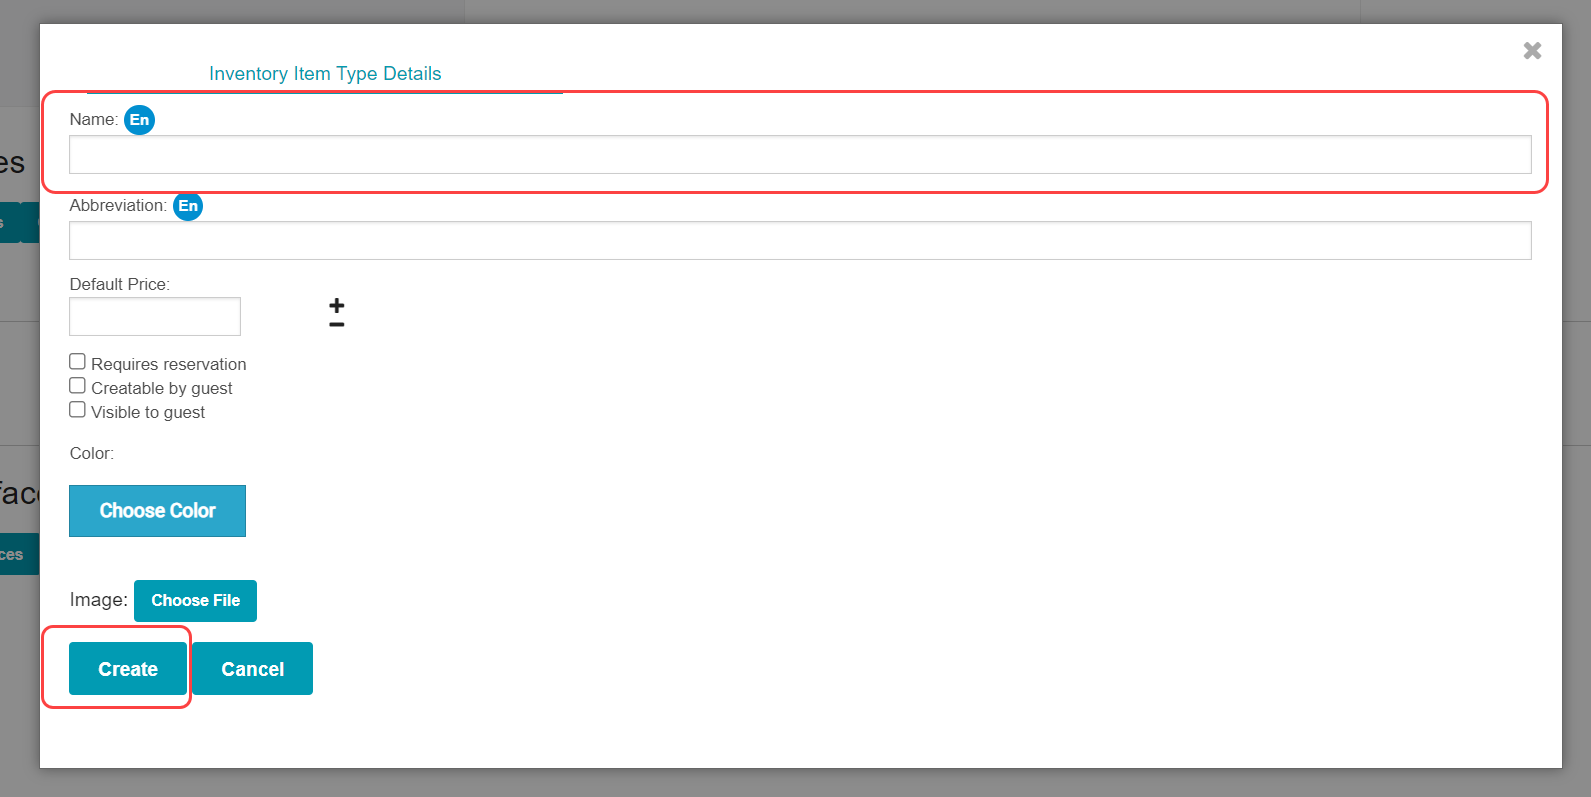
Select “Create” to save the Inventory Item Type.
| Info |
|---|
Determine the order of Inventory Item Types by selecting “Sort Inventory Item Types”. Drag and drop Inventory Item Types to the desired order then select “Save”. |
...
When adding a new Logbook entry/Inventory Item, the default fields available are “Inventory Type”, “Identifier Label”, and “Internal Notes”. To add additional fields to Logbook entries, create additional “Inventory Fields”.
...
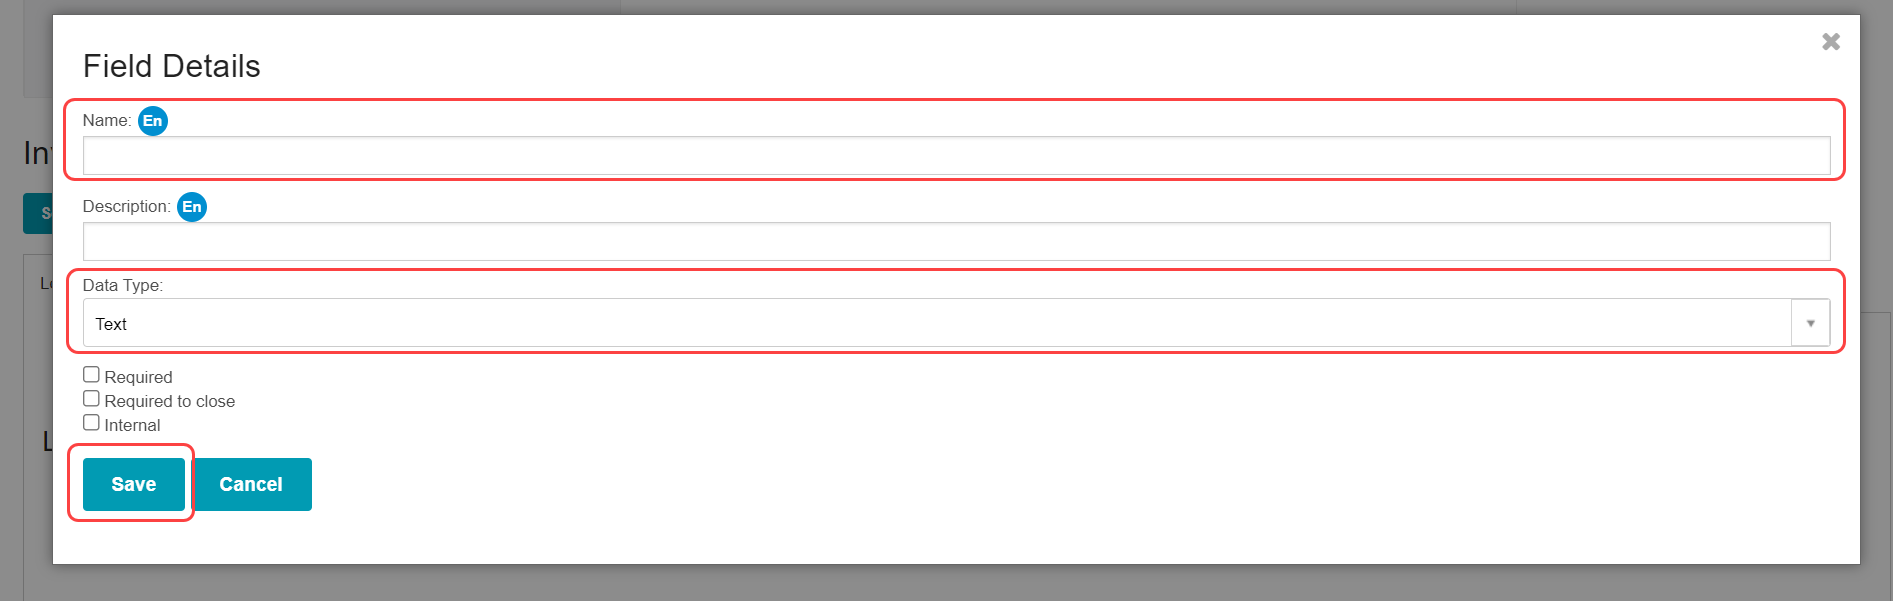
Select “Create Inventory Field”.

Enter Field Details. Required fields are “Name” and “Data Type”.
Select “Save” to create the Inventory Field.
Available Data Types for Inventory Fields
...