...
Example: Room 1 and Room 2 have an adjoining door. They can be booked by the same guest and considered one reservation. When they are booked as a unit, these rooms are identified as “Virtual Suite A” in the PMS.
🔐 User Type & Roles
To perform this action in ALICE, the user must have at least Hotel Admin User Type access.
 Things to Consider
Locations should be added during the account launch. When adding new Virtual Suite Locations, ensure that the name matches exactly to the Virtual Suite names in the PMS. If the names are not an exact match, the integration can produce errors.
The Connecting Rooms/Virtual Suite Locations must be a guest room (Guest Room checkbox must be enabled).
Each of the individual component rooms will display connecting room information in the Connecting Rooms field within Location details.
Once a set of rooms have been created as a Virtual Suite (the Virtual Suite checkbox is enabled), the connecting rooms can only be edited within the Virtual Suite Location. Connecting Rooms cannot be edited within the individual component room locations when the Virtual Suite Checkbox is enabled.
Virtual suites, once configured, will be automatically connected based on the information provided by the PMS Integration. Connecting Rooms must be manually connected/disconnected.
An Interlocking Rings icon will signify Connecting Rooms/Virtual Suites. When grey, rooms are not connected and are unoccupied. When black/bold, the rooms are connected.
View the Iconography section of Rooms Tab - Web or Rooms Tab - Mobile to learn more.
Virtual Suites will be organized into a sub-section of the appropriate floor in the unassigned rooms list.
...
Jump to “Configure Virtual Suites”
| Anchor | ||||
|---|---|---|---|---|
|
⚙ Steps
Locate one of the adjoining room locations from the list, then select “Edit”.
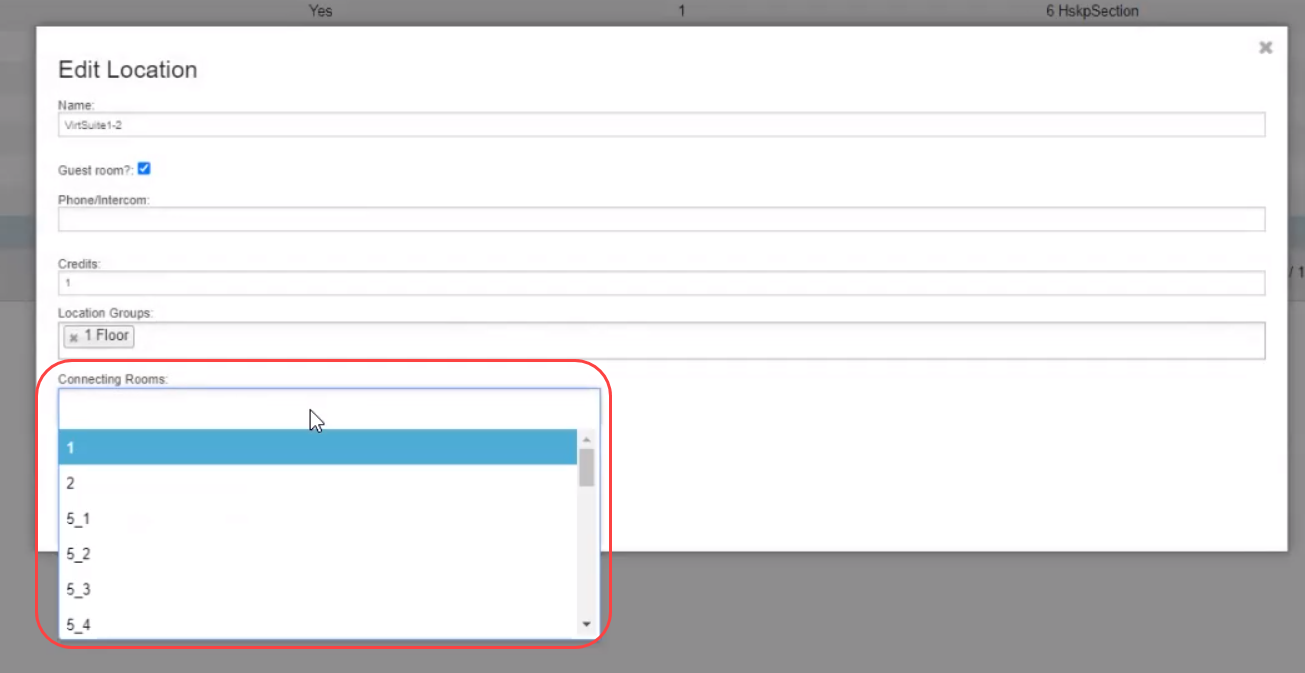
Locate the “Connecting Rooms” field.
Search for the adjoining rooms/location name.
Select the location to add it to the Connecting Rooms field.
Repeat steps 4-5 until all adjoining rooms are added.
Leave the “Virtual Suite” checkbox disabled.
Select Save.
| Anchor | ||||
|---|---|---|---|---|
|
⚙ Steps
Locate the Virtual Suite Room locations from the list, then select “Edit”.
The Virtual Suite Room names and formatting will vary by property. Generally, Virtual Suite Room names are formatted as the room name followed by a letter. Example: 101x, 203S2Locate the “Connecting Rooms” field.
Search for the adjoining rooms/location name.
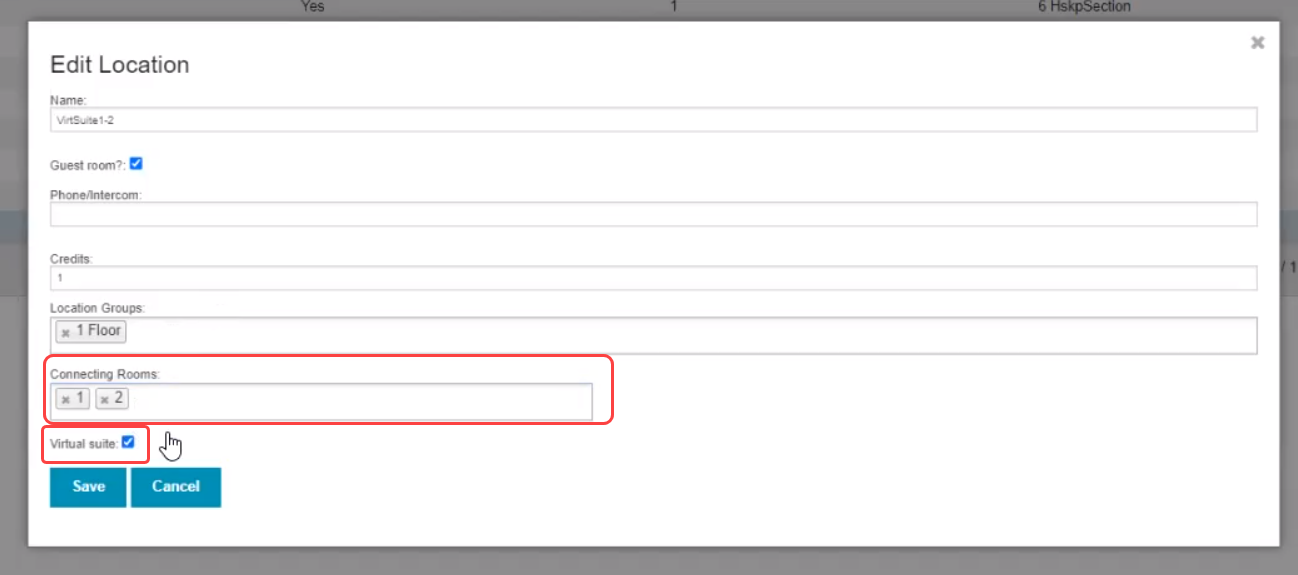
Select the location to add it to the Connecting Rooms field.
Repeat steps 4-5 until all adjoining rooms are added.
Enable the Virtual Suite checkbox
Select Save.
\uD83D\uDCCB Related articles
| Filter by label (Content by label) | ||||||||||||||||||
|---|---|---|---|---|---|---|---|---|---|---|---|---|---|---|---|---|---|---|
|