Formal housekeeping inspections are typically completed to inspect the quality of service the room received. If housekeeping inspections are a regular practice at a property, they can be configured in ALICE by a Hotel Admin by creating a checklist or series of checklists.
Once the checklist has been configured by a Hotel Admin, housekeeping users can add inspections to housekeeping tasks on the ALICE Staff app (mobile) by selecting “Add Inspection”. This creates an Associated Ticket with the inspection items added as a checklist/series of checklists.
🔐 User Type & Roles
To configure Housekeeping Inspections in ALICE, the user must have at least Hotel Admin User Type access.
To add/perform Housekeeping Inspections in ALICE, the user must have at least Employee User Type access and the following access enabled in Roles:
Access to “Rooms” tab.
Access to “Rooms”, “All Rooms”, and “Staff” under Room Assignment Mobile Tabs.

Access to “Unlimited (up to Inspected)” in Rooms (Room Assignment).

Access to “Add”, “View”, “Edit”, “Close”, Assign in Room Assignment Facility - Tickets.

 Things to Consider
Housekeeping Inspections are not intended to manage lists of tasks or to-do items for room attendants.
Housekeeping Inspections are viewable on ALICE Desktop (web) and ALICE Staff app (mobile).
The Housekeeping Room Inspection Log Report can provide summarized data around Housekeeping Inspections.
Create separate Service Options with Checklist Data Type for each area of the room that is to be inspected. This will make Housekeeping Inspections easier to manage across various room types.
Only ONE Housekeeping Inspection Service should be created to encompass Housekeeping Inspections across all room types.
The Housekeeping Inspection Service must be created in the “Room Assignment” Facility. If the Room Assignment Facility is not available in your account, please contact support@aliceplatform.com to enable.
Changes to Housekeeping Inspection Items are not retroactive and will only apply to new Inspections moving forward.
Jump to “Add Housekeeping Inspection Checklist”
Jump to “Complete Housekeeping Inspection Checklist”
Add Housekeeping Inspection Checklist
⚙ Steps
Select the “Room Assignment” Facility
Add a new Service named “Room Inspections”. Only ONE Housekeeping Inspection Service should be created.
Add Service Options for each area to be inspected. For each Service Option, complete the following fields:
Name: Name the Service Option by the area description. Add enough Service Options to cover all room types. Examples might include: “Balcony”, “Bedroom”, “Kitchenette” or “Patio”.
Data Type: Select Checklist
Settings: Enable the following settings by selecting the checkbox: “Enable Check All Button”, “Enable Weight for Items”
Add Items: Select the “Add” button, then add each inspection step/checklist item individually. Item Descriptions are optional but can provide additional instructions for each inspection item. (It is possible to add Inspection Items in bulk. Please reach out to support@aliceplatform.com for assistance)
Weight: Add a weighted score for this inspection item. Scores are calculated according to the formula (Passed Items) ÷ (Passed Items + Failed Items) = %Score.
Any inspection items that are skipped (left blank or marked N/A) are not included in the scoreSelect “Create” to save the checklist.

Complete steps 3-4 for additional Service Options/ Inspection Areas.
Complete Housekeeping Inspection Checklist
⚙ Steps
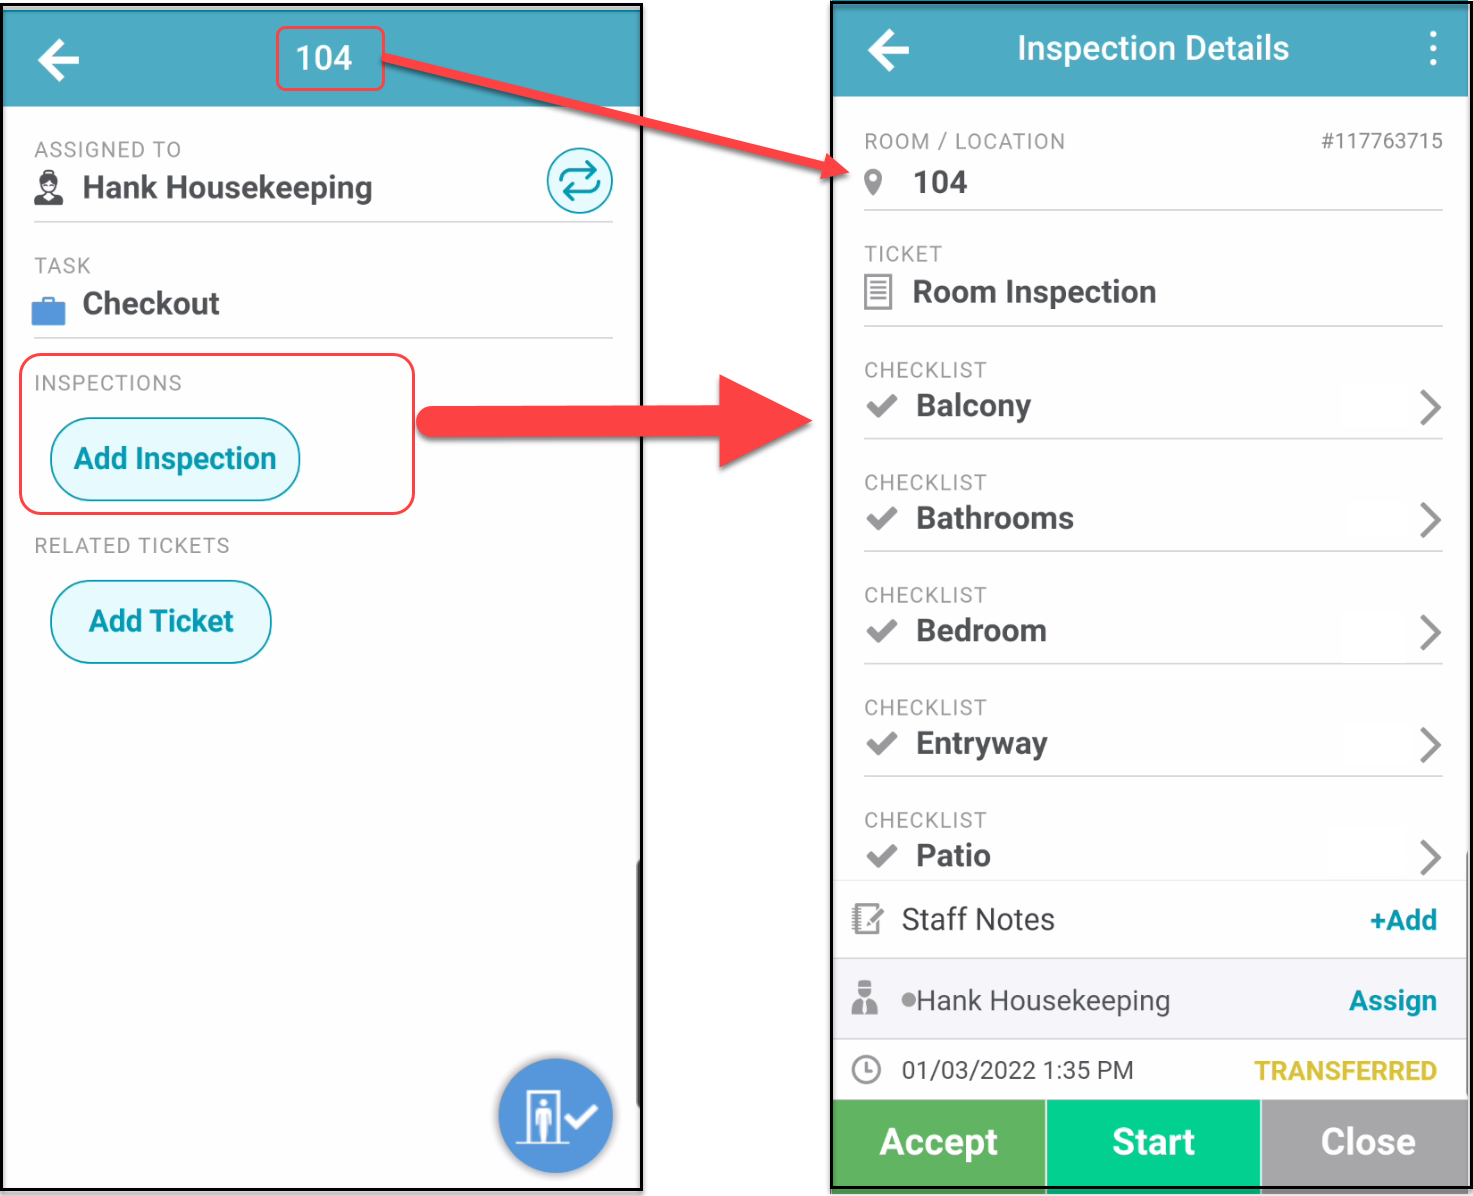
Select a Clean Room from the Room list.
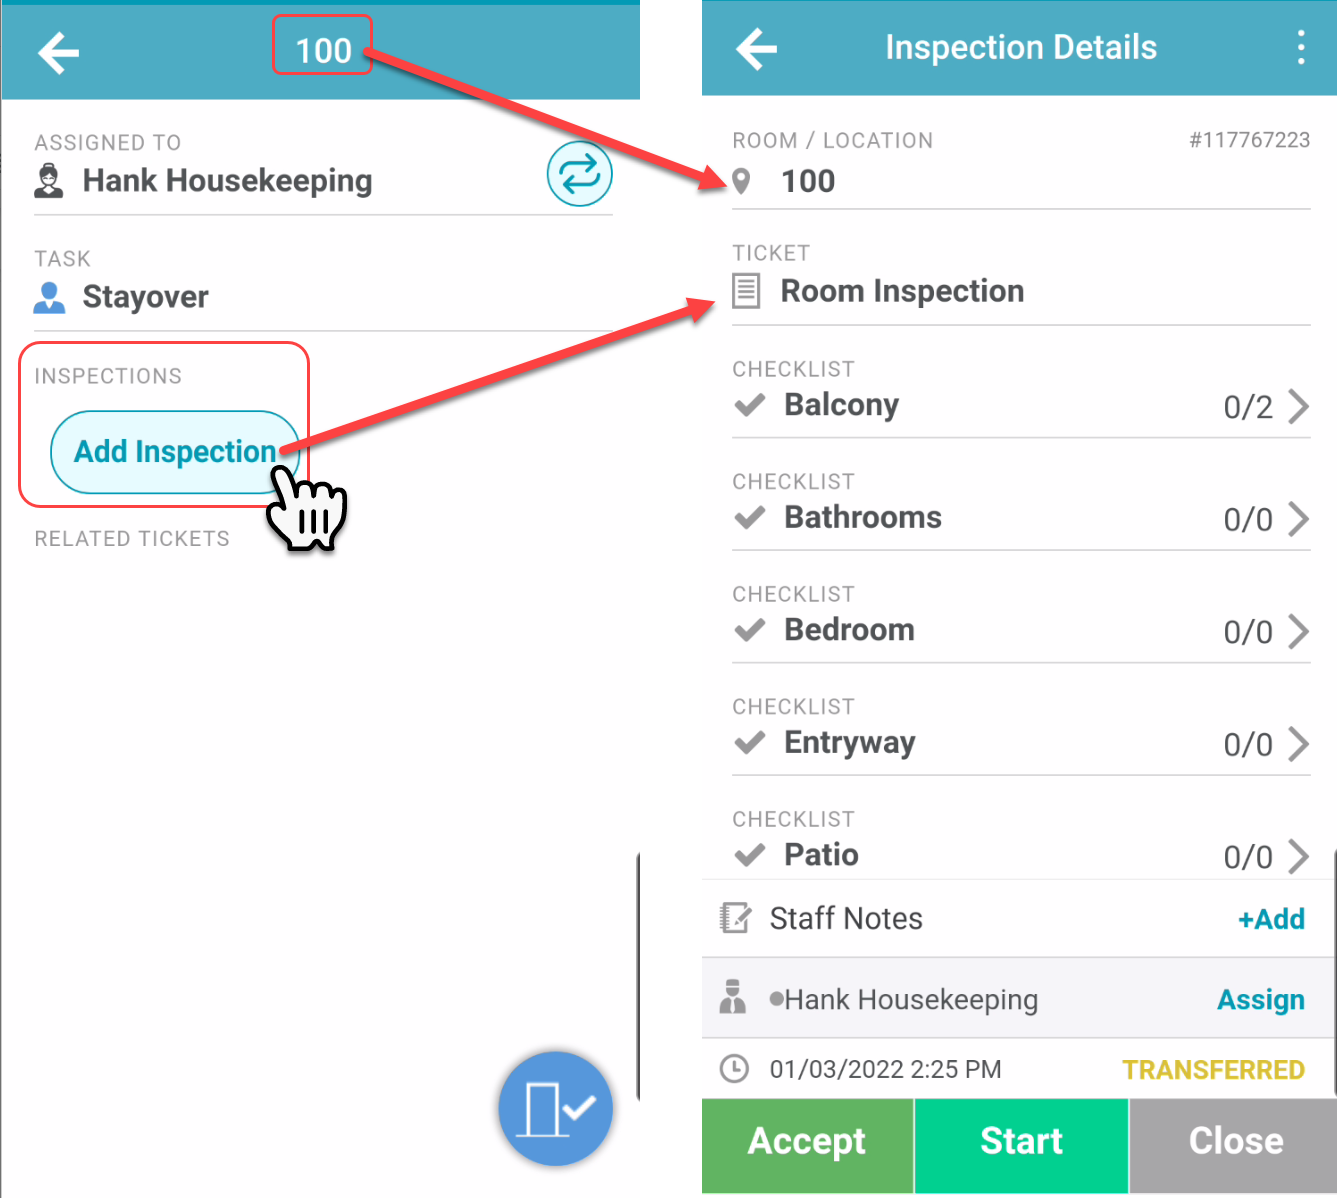
Select “Add Inspection”
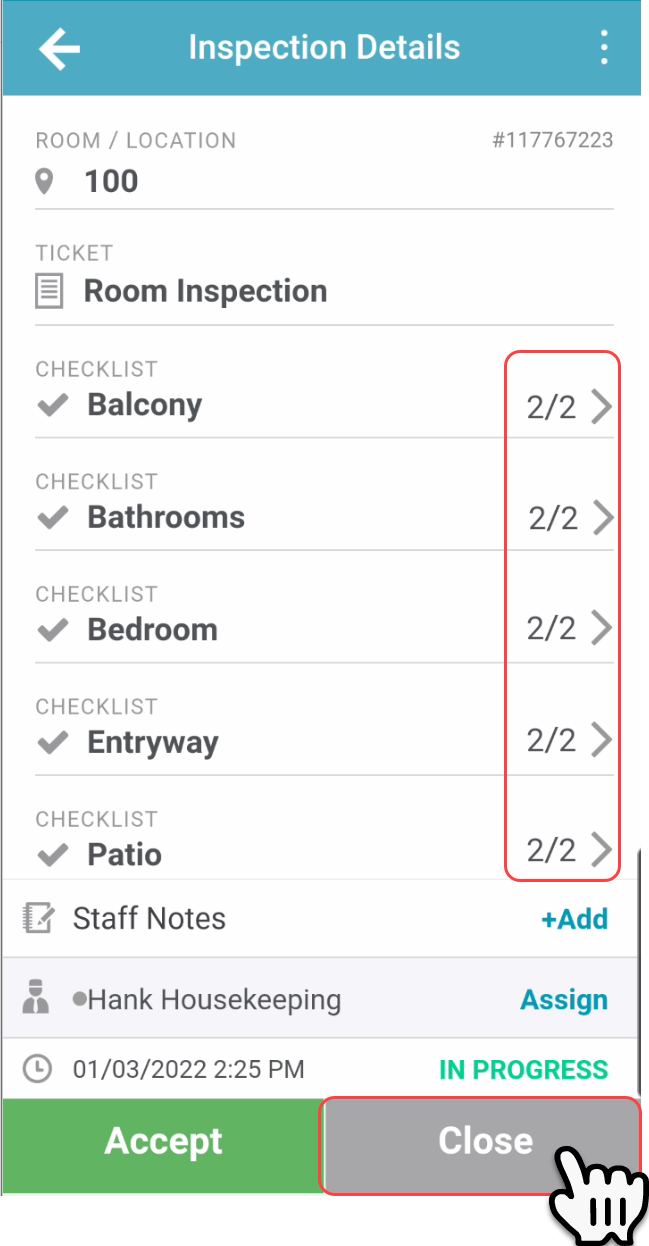
A new, Associated Ticket will populate with the Room and Room Attendant information in the “Location” and “Assign To” fields.
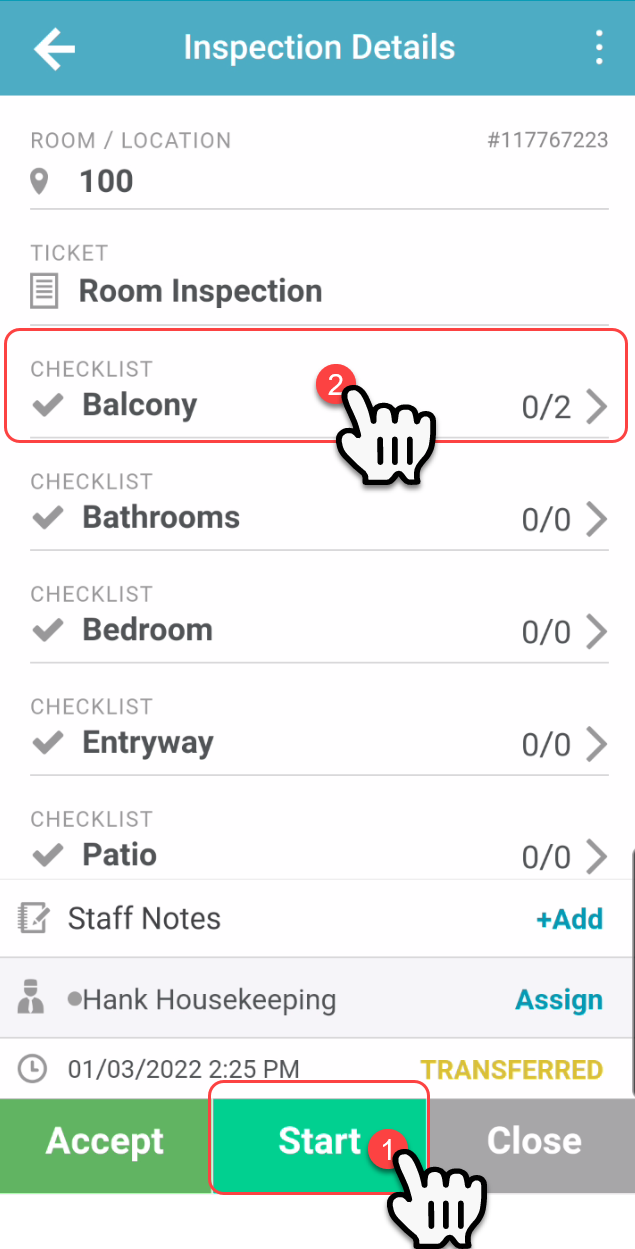
To perform the inspection, first, update the workflow status to indicate that the Inspection is in progress.
Select the first checklist. It should be named according to the area that needs to be inspected in the room. In some cases, there may be only one checklist for the inspection.
Tap the checkbox one time to mark the inspection item “pass”.
Tap the checkbox two times to mark the inspection item “fail”.
Tap the checkbox three times to mark the inspection item “skip”.Once the checklist is complete, tap “Save”.
If there are additional checklists to complete for the inspection, move on to the next checklist and repeat steps 6-7.
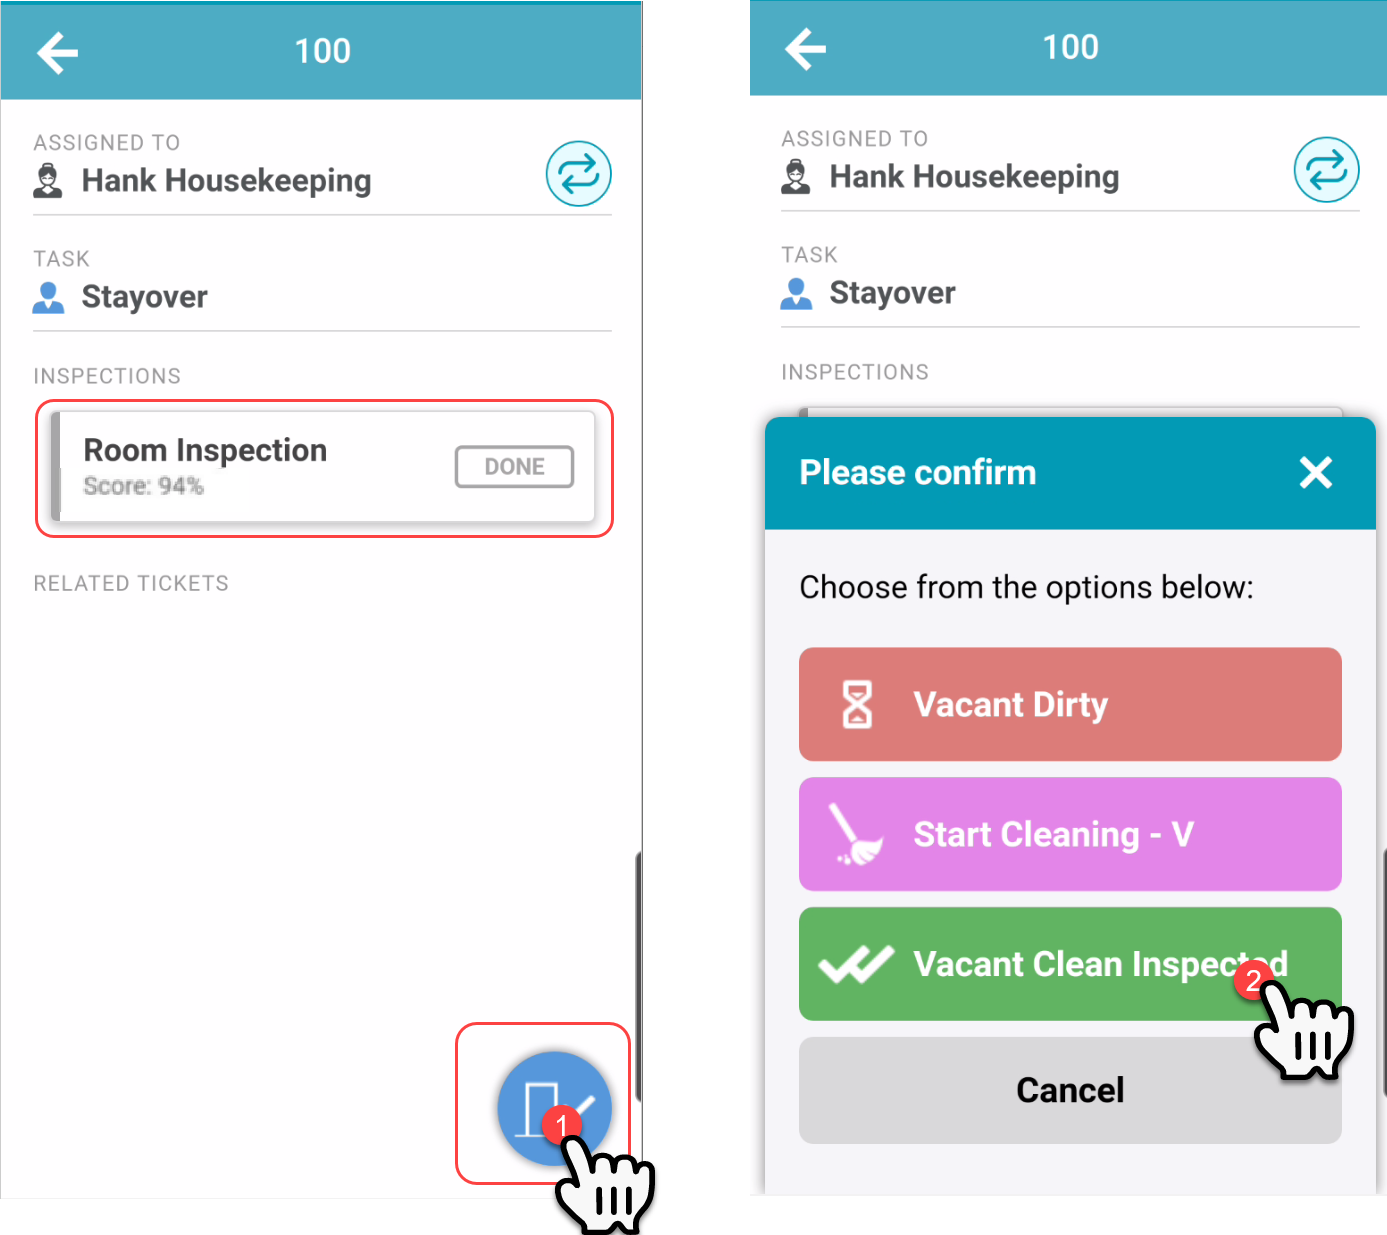
After the changes have been saved, the Housekeeping Inspection Checklist Score will display.
Once all of the checklists have been reviewed and completed, update the workflow status on the ticket to indicate that the Inspection is complete.
Return to the Room details on the room list. The Associated Room Inspection Ticket should display as completed. Mark the room as Inspected by changing the workflow status to “Inspected”.